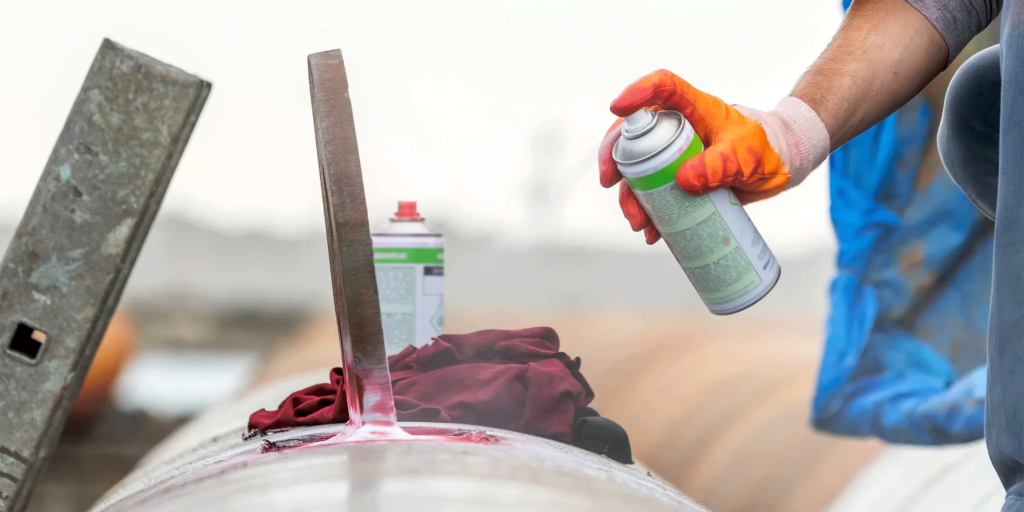
Guide
Dye Penetrant Testing: An In-Depth Guide [New for 2025]
Dye Penetrant Testing (DPT) is an NDT method that uses dye or liquid applied to surfaces to identify surface-breaking defects in non-porous materials.
Alternate phrases for DPT include:
- Dye penetrant inspection (DPI)
- Liquid penetrant testing (LPT)
- Liquid penetrant inspection (LPI)
- Penetrant testing (PT)
- Fluorescent penetrant testing (FPT)
Dye penetrant testing is particularly effective for identifying the following types of defects on the surface of materials like metals, ceramics, and plastics:
- Crack formations and holes
- Pores and pinholes/surface porosity
- Leaks
- Other discontinuities
Top industries for using DPT include aerospace, automotive, manufacturing, and construction (we cover top applications for acoustic testing below).
This article provides an in-depth overview of dye penetrant testing, exploring the tools and techniques used, the various types of DPT methods, and the scenarios where this method is most beneficial.
Have a specific topic in mind? Use the menu to the right to jump around within this guide.
What Is Dye Penetrant Testing?
Dye Penetrant Testing (DPT) involves applying a liquid penetrant to the surface of a material, allowing it to seep into any cracks or defects, and then using a developer to draw the penetrant back to the surface, where it becomes visible under appropriate lighting conditions.
Using this approach, inspectors can identify potential issues in the surface of the material, helping them locate the presence of defects that could require maintenance.
Principles of Dye Penetrant Testing
The fundamental principle of DPT is based on capillary action, in which a liquid penetrant is drawn into surface-breaking defects.
Here are the key steps involved in DPT:
1. Surface Preparation
Inspectors thoroughly clean the surface of the material you plan to test to remove any contaminants such as dirt, grease, or paint that could interfere with the penetrant’s ability to enter defects.
2. Application of Penetrant
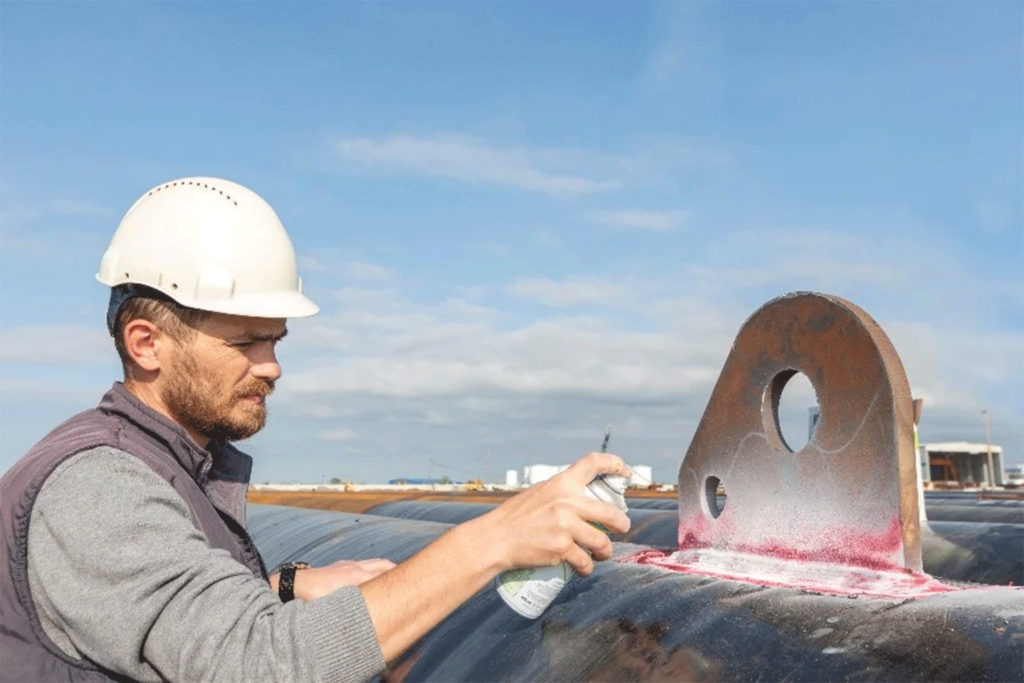
Inspectors apply liquid penetrant to the surface of the material, typically using a spray, brush, or immersion method. After application, they allow it to stay on the surface for a set period of time—called dwell time—to make sure it penetrates any defects.
3. Excess Penetrant Removal
After the dwell time, inspectors carefully remove the excess penetrant from the surface, leaving only the penetrant that has seeped into defects.
4. Application of Developer
Inspectors apply a developer to the surface to draw the penetrant out of defects and create a visible indication. The developer acts as a blotter, pulling the penetrant to the surface and spreading it to form a visible mark.
5. Inspection
Inspectors examine the surface under appropriate lighting conditions (visible light or ultraviolet light for fluorescent penetrants) to identify and evaluate the indications of defects.
6. Post-Cleaning
After inspection, inspectors clean the material, removing the developer and any remaining penetrant from the surface and returning the surface of the material to its original state.
Advantages of Dye Penetrant Testing
- High sensitivity. DPT is highly sensitive to small surface-breaking defects, making it effective for detecting minute cracks and other discontinuities.
- Versatility. Can be used on a wide range of non-porous materials, including metals, ceramics, plastics, and composites.
- Cost-effective. Generally less expensive than other NDT methods, making it an economical choice for many applications.
- Ease of use. Relatively simple and doesn’t require complex equipment, allowing for quick and easy inspections.
Limitations of Dye Penetrant Testing
- Surface preparation. Proper surface preparation is required to remove contaminants that could interfere with the penetrant’s ability to enter defects.
- Surface-only detection. Only effective for detecting surface-breaking defects, can’t identify subsurface flaws.
- Material restrictions. Not suitable for porous materials, as the penetrant will seep into the entire material rather than just the defects.
- Environmental and health concerns. Use of chemicals in the penetrant and developer requires proper handling and disposal to ensure environmental and health safety.
Dye Penetrant Testing Tools
Dye Penetrant Testing (DPT) involves the use of various tools and materials, among which inspectors can make different choices based on their needs and preference for how to do the testing.
Below are the most common types of dye penetrant testing tools. We’ve organized these tools into five categories, with specific types listed for each one (some categories only have one type).
1. Penetrants
I. Visible penetrants are penetrants that are visible under normal lighting conditions, typically colored red for easy visibility.
- How they work. The penetrant is applied to the surface and allowed to dwell, seeping into any surface-breaking defects. Excess penetrant is then removed, and a developer is applied to reveal the defects.
- Applications. Suitable for general-purpose inspections in well-lit environments, where high sensitivity is not required.
II. Fluorescent penetrants are penetrants that fluoresce under ultraviolet (UV) light, providing high contrast for identifying irregularities.
- How they work. Inspectors apply the penetrant to the surface and allow it to dwell. After removing the excess penetrant, they apply a developer and inspect the surface under UV light, which causes the penetrant to glow brightly in defects.
- Applications. Preferred for high-sensitivity inspections and in low-light environments, such as aerospace and automotive industries.
2. Cleaners
I. In the context of DPT, cleaners include solvents or detergents used to clean the surface of a material before and after applying the penetrant.
- How they work. Cleaners remove contaminants such as dirt, grease, oil, and paint that could interfere with the penetrant’s ability to enter defects and with the visibility of indications.
- Applications. Essential for proper surface preparation and post-inspection cleaning in all DPT processes.
3. Developers
I. Dry powder developers are finely divided powders that inspectors apply to the surface of materials after removing excess penetrant.
- How they work. The powder draws the penetrant out of defects and spreads it, forming a visible indication.
- Applications. Suitable for use on rough surfaces and in conditions where liquid developers are not practical.
II. Wet developers are developers suspended in a liquid carrier, available in water-based or solvent-based formulations.
- How they work. The developer is sprayed or brushed onto the surface, where it helps to draw the penetrant out of defects and create a visible indication.
- Applications. Ideal for smooth surfaces and detailed inspections, providing better particle mobility and visibility.
III. Non-aqueous wet developers are developers suspended in a solvent, often used in aerosol form.
- How they work. Inspectors spray the developer onto the surface, where it evaporates, leaving a thin film that draws out the penetrant and forms a visible indication.
- Applications. Used in field inspections and situations where quick drying is required.
4. Lighting Equipment
I. Visible light sources are standard lighting equipment used to inspect indications formed by visible penetrants.
- How they work. Adequate lighting ensures that indications are clearly visible to the inspector.
- Applications. Essential for inspections using visible penetrants in well-lit environments.
II. Ultraviolet (UV) light sources are UV lamps used to illuminate fluorescent penetrant indications.
- How they work. UV light causes the fluorescent penetrant to glow brightly, making indications highly visible.
- Applications. Critical for high-sensitivity inspections using fluorescent penetrants, especially in low-light environments.
5. Application Tools
I. Spray bottles and aerosols are containers used to apply penetrants, developers, and cleaners to the surface of the material.
- How they work. These tools ensure even and controlled application of the testing materials.
- Applications. Commonly used for quick and efficient application in both laboratory and field settings.
II. Brushes and immersion tanks are tools used for applying penetrants and developers, especially in controlled environments.
- How they work. Brushes allow for precise application, while immersion tanks are used for dipping parts into the penetrant.
- Applications. Suitable for detailed inspections and large-scale testing operations.
Types of Dye Penetrant Testing
Dye Penetrant Testing (DPT) encompasses several techniques, each tailored to specific inspection needs and applications. These methods vary based on the type of penetrant used and the method of application.
Here are the main types of dye penetrant testing:
1. Visible Dye Penetrant Testing
A method that uses visible (non-fluorescent) penetrants to detect surface-breaking defects.
- How it works. Inspector applies the penetrant to the surface, allows it to dwell, and then removes it. A developer is applied to draw the penetrant out of defects, creating visible indications under normal lighting conditions.
- Applications. Suitable for general-purpose inspections where high sensitivity is not required and in well-lit environments, such as routine maintenance and quality control in manufacturing.
2. Fluorescent Dye Penetrant Testing
A method that uses fluorescent penetrants to detect surface-breaking defects, providing high-contrast indications under ultraviolet (UV) light.
- How it works. Inspectors apply the fluorescent penetrant to the surface, allow it to dwell, and then remove it. Then they apply a developer to draw the penetrant out of defects. After these steps, they inspect the surface under UV light, which makes the penetrant in the defects glow brightly, making indications highly visible.
- Applications. Preferred for high-sensitivity inspections and in low-light environments, such as in aerospace, automotive, and critical structural components where detecting even the smallest defects is crucial.
3. Water-Washable Penetrant Testing
A type of dye penetrant testing where the excess penetrant can be washed off the surface using water.
- How it works. Inspectors apply the water-washable penetrant to the surface and allow it to dwell. After the dwell time, they remove the excess penetrant with a water rinse, apply a developer to draw the penetrant out of defects, creating visible indications, and perform their inspection.
- Applications. Suitable for inspections where ease of removal is important, commonly used in manufacturing and maintenance operations.
4. Post-Emulsifiable Penetrant Testing
A method that uses a post-emulsifiable penetrant, which requires an emulsifier to make the excess penetrant water-washable.
- How it works. Inspectors apply the penetrant and allow it to dwell. Then they apply an emulsifier to the surface, converting the penetrant into a water-washable form. After rinsing off the emulsified penetrant, they apply a developer to reveal defects, and perform their inspection.
- Applications. Ideal for high-sensitivity inspections where controlled removal of penetrant(s) is necessary, such as in aerospace and precision engineering.
5. Solvent-Removable Penetrant Testing
A method where the excess penetrant is removed using a solvent cleaner.
- How it works. Inspectors apply the solvent-removable penetrant to the surface and allow it to dwell. Then they remove excess penetrant with a solvent cleaner, apply a developer to draw the penetrant out of defects and create visible indications, and perform the inspection.
- Applications. Suitable for field inspections and situations where water is not readily available, commonly used in maintenance and inspection of large structures.
Choosing Penetrants, Removers, and Developers for Dye Penetrant Testing
Selecting the right penetrants, removers, and developers is a crucial part of doing liquid penetrant testing.
Each component plays a vital role in revealing surface-breaking defects in non-porous materials.
This section outlines the options available for each component and provides guidance on making the best choices based on your specific testing needs.
1. Choosing Penetrants
Penetrants are the liquids that seep into surface defects.
Applying them is the first step in the dye penetrant testing process—they’re available in several formulations and can be categorized based on their visibility and sensitivity.
Here are the main penetrant options:
I. Visible (Color Contrast) Penetrants
Visible penetrants are typically red and provide high visibility against the white developer background.
- Applications. Suitable for general-purpose inspections where high sensitivity is not required. Commonly used in field inspections and maintenance checks.
- Advantages. Easy to apply and interpret without the need for special equipment.
II. Fluorescent Penetrants
These penetrants glow under ultraviolet (UV) light, providing high sensitivity and visibility of defects.
- Applications. Ideal for high-sensitivity inspections in sectors like critical infrastructure, aerospace, and the automotive industry, where detecting very fine defects is essential.
- Advantages. Offers superior defect detection capabilities, especially in low-light conditions.
Additional Penetrant Consideration: Sensitivity Levels
The sensitivity levels for penetrant options range from Level 1 (Low Sensitivity) to Level 4 (Ultra-High Sensitivity), with each level indicating the penetrant’s ability to detect increasingly fine defects.
Higher sensitivity levels are used for critical inspections requiring the detection of very small and subtle defects, such as those in aerospace components.
- Level 1 (low sensitivity). For detecting large, easily visible defects.
- Level 2 (medium sensitivity). General-purpose inspections.
- Level 3 (high sensitivity). For critical inspections requiring the detection of fine defects.
- Level 4 (ultra-high sensitivity). Used in applications where the highest sensitivity is necessary, such as aerospace components.
2. Choosing Removers
Removers are used to clean excess penetrant from the surface before applying the developer.
The choice of remover depends on the type of penetrant used and the material being inspected.
Here are the main remover options:
I. Solvent Removers
Solvent-based removers are used to clean both visible and fluorescent penetrants.
- Applications. Suitable for most materials and environments. Commonly used in field and laboratory settings.
- Advantages. Effective at removing dye penetrant without leaving residue, ensuring clear indications.
II. Water-Washable Removers
These removers allow the penetrant to be washed off with water.
- Applications. Ideal for use with water-washable penetrants in environments where water is readily available.
- Advantages. Simple and quick removal process, environmentally friendly.
III. Post-Emulsifiable Removers
These require an emulsifier to be applied before the penetrant can be washed off with water.
- Applications. Used with post-emulsifiable penetrants to control the removal process and enhance sensitivity.
- Advantages. Provides greater control over the removal process, allowing for more precise inspections.
3. Choosing Developers
Developers help draw out the penetrant trapped in defects to the surface, creating a visible indication of irregularities in a surface. They come in several forms, each with unique benefits.
Here are the main developer options:
I. Dry Powder Developers
Fine powders applied to the test surface to absorb penetrant.
- Applications. Commonly used for inspections where minimal mess is preferred.
- Advantages. Simple application, suitable for most environments, especially field inspections.
II. Water-Suspendible Developers
Powders suspended in water, creating a slurry that is applied to the test surface.
- Applications. Ideal for large surfaces and when water is available.
- Advantages. Provides even coverage and is easy to remove after inspection.
III. Water-Soluble Developers
Dissolves in water to form a clear solution applied to the test surface.
- Applications. Suitable for controlled environments like laboratories.
- Advantages. Easy application and removal, minimal residue.
IV. Non-Aqueous Wet Developers
Suspensions of developers in solvents, sprayed onto the test surface.
- Applications. Applications. Used when water-based developers are unsuitable.
- Advantages. Quick drying, high sensitivity, suitable for small, intricate parts.
4. Additional Considerations for Choosing Penetrants, Removers, and Developers
Here are a few other important things to keep in mind when choose penetrants, removers, and developers for liquid penetrant testing:
- Compatibility. Ensure that the chosen penetrant, remover, and developer are compatible with each other and with the material being tested. Refer to manufacturer recommendations and industry standards for guidance.
- Environment. Consider the testing environment (field vs. lab) and the available resources (water supply, UV light) when selecting these products.
- Health and safety. Evaluate the health and safety implications of the products, particularly in terms of flammability, toxicity, and the need for protective equipment.
- Industry standards. Adhere to relevant industry standards and regulations (e.g., ASTM E1417/E1417M) to ensure safety, compliance, and reliability of the test results.
When Is Dye Penetrant Testing Required?
Dye penetrant testing is an essential inspection method in several industrial scenarios to ensure the quality, safety, and reliability of materials and components.
Here are the main situations that call for dye penetrant testing:
1. Quality Control and Assurance in Manufacturing
- Production processes. During manufacturing, DPT is used to verify that materials and components meet specified quality standards. Doing this involves detecting surface-breaking defects such as cracks, pores, and inclusions to ensure the integrity of the final product.
- Incoming material inspection. DPT is employed to inspect raw materials before they’re used in production, ensuring they meet the required specifications and are free from surface defects.
2. Weld Inspection
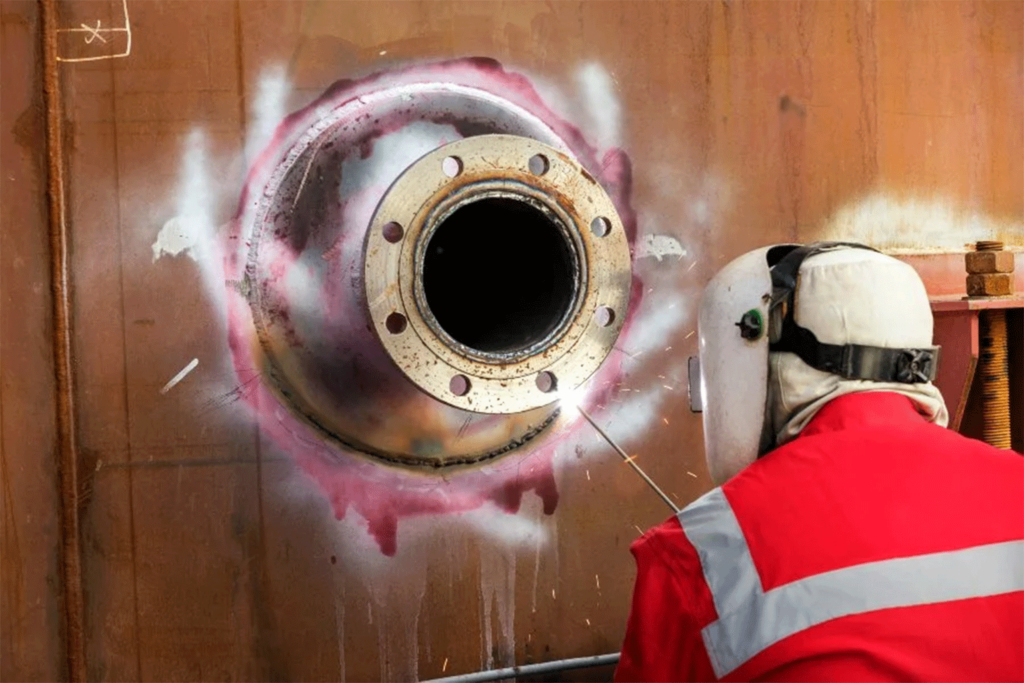
- Weld integrity. Dye penetrant testing is crucial for inspecting welds to detect surface-breaking flaws such as cracks, lack of fusion, and porosity. Ensuring weld integrity is vital for the structural safety of welded joints.
- Post-weld inspection. After welding, DPT is used to inspect welded joints for any surface defects that may have formed during the welding process.
3. Preventive Maintenance and Scheduled Inspections
- Routine maintenance. DPT is part of regular preventive maintenance schedules to monitor the condition of critical components and infrastructure. This helps in early detection of potential issues, preventing unexpected failures and downtime.
- Condition monitoring. Continuous or periodic DPT inspections enable the monitoring of components under operational conditions, providing valuable data on their health and predicting their remaining service life.
4. Safety Compliance and Regulatory Requirements
- Regulatory standards. Many industries are subject to stringent safety regulations that mandate regular dye penetrant testing. Compliance with these regulations ensures that components and structures meet safety standards, reducing the risk of accidents.
- Certification and accreditation. DPT is often required for certification purposes, such as obtaining pressure vessel and pipeline certifications from regulatory bodies.
5. Research and Development
- Material characterization. In research and development, DPT helps characterize new materials, studying their properties and behavior under different conditions. This information is vital for developing advanced materials with enhanced performance.
- Prototype testing. DPT is used to evaluate prototypes, identifying any flaws or weaknesses that need to be addressed before full-scale production.
The Top 5 Industries that Rely on Dye Penetrant Testing + Specific Applications They Use
Liquid penetrant testing is a versatile non-destructive testing method with applications across a wide range of industries.
Here are the top five industries that use DPT, with specific applications covered for each one.
1. Oil and Gas Industry
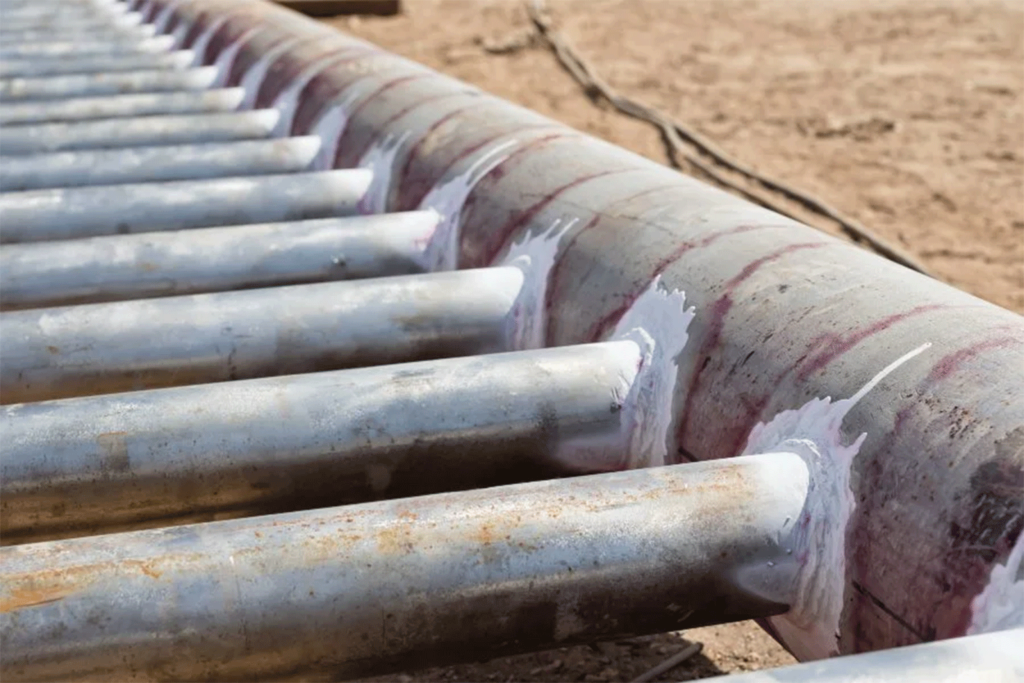
In the oil and gas industry, dye penetrant testing is vital for maintaining the safety and reliability of pipelines and other infrastructure.
- Pipeline inspections. DPT is used to detect surface-breaking defects in pipelines, ensuring their integrity and preventing leaks or ruptures that could lead to environmental disasters.
- Pressure vessel inspections. Monitoring pressure vessels for signs of surface defects such as cracks and corrosion, ensuring their safe operation.
- Drill pipe and casing inspections. Inspecting drill pipes and casings for surface defects that could compromise the safety and efficiency of drilling operations.
2. Power Generation Industry
In power generation, dye penetrant testing is essential for maintaining the integrity of critical components in power plants.
- Turbine blade inspections. DPT is used to inspect turbine blades for surface defects, ensuring they can operate efficiently and safely under high stress and temperature conditions.
- Boiler and pressure vessel inspections. Detecting surface defects in boilers and pressure vessels, ensuring their safe operation and preventing unexpected failures.
- Generator and transformer inspections. Inspecting critical components of generators and transformers, ensuring their reliability and performance in power generation systems.
3. Manufacturing Industry
In the manufacturing industry, dye penetrant testing is crucial for ensuring product quality and reliability.
- Quality assurance. DPT is used to inspect raw materials, intermediate products, and final assemblies for surface-breaking defects such as cracks, pores, and inclusions. This ensures that only defect-free products reach the customer.
- Machined part inspections. Inspecting machined parts for defects, ensuring they meet design specifications and tolerances.
- Surface coating inspections. Inspecting surface coatings for thickness and uniformity, ensuring they provide adequate protection and meet quality standards.
4. Aerospace Industry
The aerospace industry relies heavily on dye penetrant testing to maintain the safety and performance of aircraft components.
- Aircraft structural inspections. DPT is used to inspect critical structural components such as wings, fuselage sections, and landing gear for surface-breaking defects like cracks and corrosion. Ensuring these components are free of flaws is vital for flight safety.
- Engine components. Monitoring engine components, detecting surface defects that could compromise engine performance and safety.
- Composite material inspections. Inspecting composite materials for surface cracks and other defects that could affect their integrity and performance.
5. Automotive Industry
The automotive industry employs dye penetrant testing to ensure the quality and safety of vehicle components.
- Engine component inspections. DPT is used to inspect critical engine components such as cylinder heads, crankshafts, and camshafts for surface-breaking defects, ensuring they meet safety and performance standards.
- Wheel and axle inspections. Detecting cracks and other defects in wheels and axles, ensuring they can withstand operational stresses and maintain vehicle safety.
- Weld inspection. Inspecting welds in vehicle frames and body panels, ensuring they are free from defects and can withstand operational stresses.
Best Practices for Dye Penetrant Testing
To ensure the effectiveness and reliability of dye penetrant testing (DPT), it is essential to follow best practices.
These guidelines help maximize the accuracy of dye penetrant inspections and minimize risks associated with the testing process.
1. Proper Training and Certification
- Qualified personnel. Ensure that dye penetrant testing is conducted by trained and certified technicians. Certification from recognized bodies such as the American Society for Nondestructive Testing (ASNT) or equivalent organizations is essential. Properly trained personnel are more likely to conduct accurate inspections and correctly interpret results.
- Continuous education. Encourage ongoing education and training to keep DPT technicians updated on the latest techniques, equipment, and industry standards. This can include workshops, seminars, and certification renewal courses. Staying current with industry developments related to liquid penetrant testing helps maintain high standards of inspection quality.
2. Appropriate Equipment Selection
- Penetrant selection. Choose the right type of penetrant (visible or fluorescent, water-washable, post-emulsifiable, or solvent-removable) based on the material and type of inspection. Factors to consider include sensitivity, ease of removal, and environmental conditions. The correct penetrant ensures optimal defect detection and ease of use.
- Cleaner selection. Use appropriate cleaners to remove contaminants from the surface before and after the application of the penetrant. Effective cleaning is crucial for accurate test results as it ensures the penetrant can properly enter defects.
- Developer selection. Select the appropriate type of developer (dry powder, water-based, or non-aqueous) to suit your specific inspection needs. The right developer helps reveal defects by drawing the penetrant out and spreading it on the surface for better visibility.
3. Surface Preparation
- Clean surfaces. Thoroughly clean the surface of the material you’re inspecting to remove any contaminants such as dirt, grease, oil, and paint. Contaminants can impede the penetrant’s ability to enter defects and affect the visibility of indications. Proper cleaning ensures accurate and reliable results.
- Smooth surfaces. Ensure the surface is smooth and free from any coatings that might hinder the inspection process. Smooth surfaces improve the effectiveness of penetrant and developer application, leading to clearer indications.
4. Inspection Procedures
- Standard operating procedures (SOPs). Develop and adhere to detailed SOPs for each type of dye penetrant inspection. SOPs ensure consistency, thoroughness, and compliance with regulatory requirements. They provide a step-by-step guide to performing inspections, helping to maintain high standards.
- Controlled application. Apply the penetrant evenly across the surface and allow sufficient dwell time for the penetrant to enter any surface-breaking defects. Controlled application and appropriate dwell time are crucial for the penetrant to seep into all defects effectively.
- Excess penetrant removal. Carefully remove excess penetrant from the surface without disturbing the penetrant within the defects. This step is critical to avoid false indications and ensure accurate results.
- Developer application. Apply the developer uniformly to draw out the penetrant from defects, making them visible for inspection. Proper application of the developer enhances defect visibility and facilitates accurate interpretation.
5. Inspection Conditions
- Adequate lighting. Ensure appropriate lighting conditions for the inspection. Use visible light for inspections with visible penetrants and UV light for inspections with fluorescent penetrants. Adequate lighting is essential for accurately detecting and interpreting indications.
- Environmental control. Perform inspections in a controlled environment to avoid contamination and ensure consistent results. Temperature, humidity, and cleanliness of the inspection area can affect the test outcomes.
6. Data Recording and Analysis
- Systematic documentation. Record and document inspection data systematically, including defect locations, sizes, and types. Accurate documentation helps in tracking the condition of components over time and provides valuable information for future inspections.
- Advanced software. Use advanced data analysis software that can enhance the interpretation of results, generate detailed reports, and store inspection records efficiently. Digital tools help streamline the inspection process and improve accuracy.
7. Regular Equipment Maintenance
- Routine checks. Perform regular maintenance and routine checks on dye penetrant testing equipment to ensure it’s in good working condition. This includes inspecting spray bottles, immersion tanks, UV lamps, and other tools for wear and damage.
- Calibration. Regularly calibrate inspection equipment according to manufacturer guidelines and industry standards to maintain accuracy and reliability. Calibration ensures that the equipment performs correctly and will provide consistent results.
8. Safety Protocols
- Protective gear. Ensure that technicians wear appropriate protective gear, such as gloves, safety glasses, and protective clothing, to protect against exposure to chemicals used in the penetrant and developer. Safety gear helps prevent skin contact and inhalation of potentially harmful substances.
- Safe handling of chemicals. Follow safe handling procedures for chemicals, including proper storage, use, and disposal. Proper handling minimizes health risks and environmental impact.
- Ventilation. Conduct inspections in well-ventilated areas to avoid the buildup of fumes from penetrants, developers, and cleaners. Good ventilation reduces the risk of inhaling hazardous vapors.
9. Compliance with Regulations
- Regulatory standards. Ensure compliance with all relevant regulatory standards and guidelines for dye penetrant testing. This includes obtaining necessary certifications and adhering to industry best practices. Compliance ensures that inspections meet required safety and quality standards.
- Inspections and audits. Conduct regular inspections and audits to verify compliance with safety protocols and regulatory requirements. Address any identified issues promptly to maintain a safe and compliant inspection environment.

